

Engage with your members, get people along to your events, build a community. Nearly two-thirds of UNISON members are on Facebook, so how do you get started?
Before you start
Your Facebook profile. You need a Facebook profile to set up and administer a Facebook page. When you create a page, you can use your personal Facebook account, or you can set up a new Facebook account with a new email address with minimal info. Whatever you choose, your personal account will NOT be linked publicly to your Facebook page.
Your branch Facebook page in 7 steps
Create a page
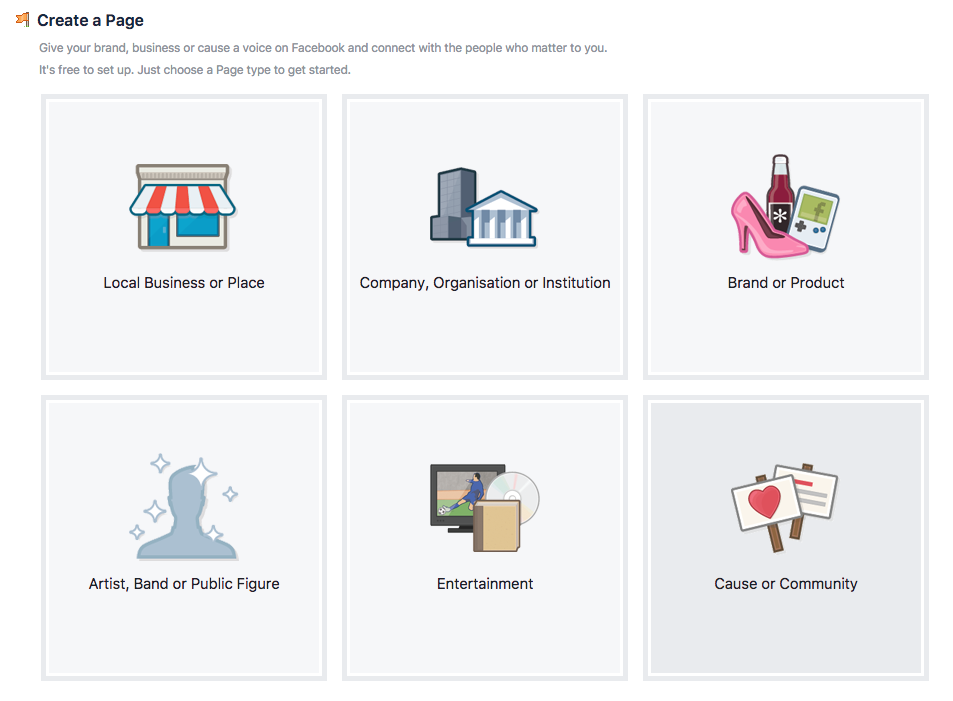
- Click ‘create a page’
- Type – cause or community
About
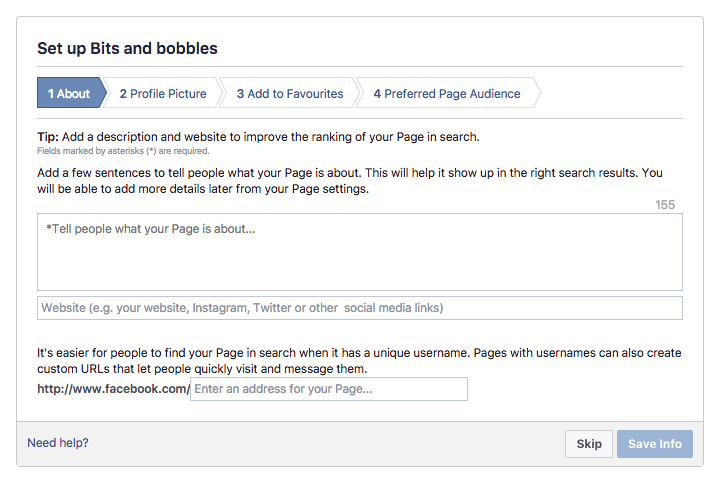
3. About – who you are, contact details – include the UNISON helpline 0800 0857 857, your website address, your contact details and/or join unison.org.uk.
4. Unique username. Choose wisely, it’s hard to change it later
Profile picture
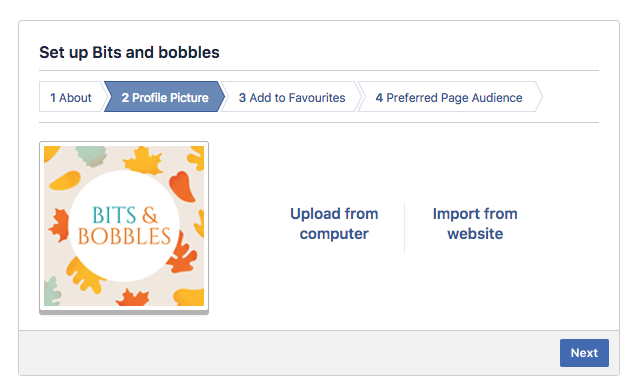
5. Profile pic – usually your UNISON branch logo. This is the square image on every post you send out – the only way people can identify who the post in their feed is from – so it must be readily identifiable as your organisation
6. Favourites – skip or add if you need to make it easier for you to find your page in your sidebar
7. Preferred Page audience. Skip or add United Kingdom, or add your local area. The page will still be visible to everyone, but Facebook will push it up more in the area you choose.
Your page is created!
Set up your page up
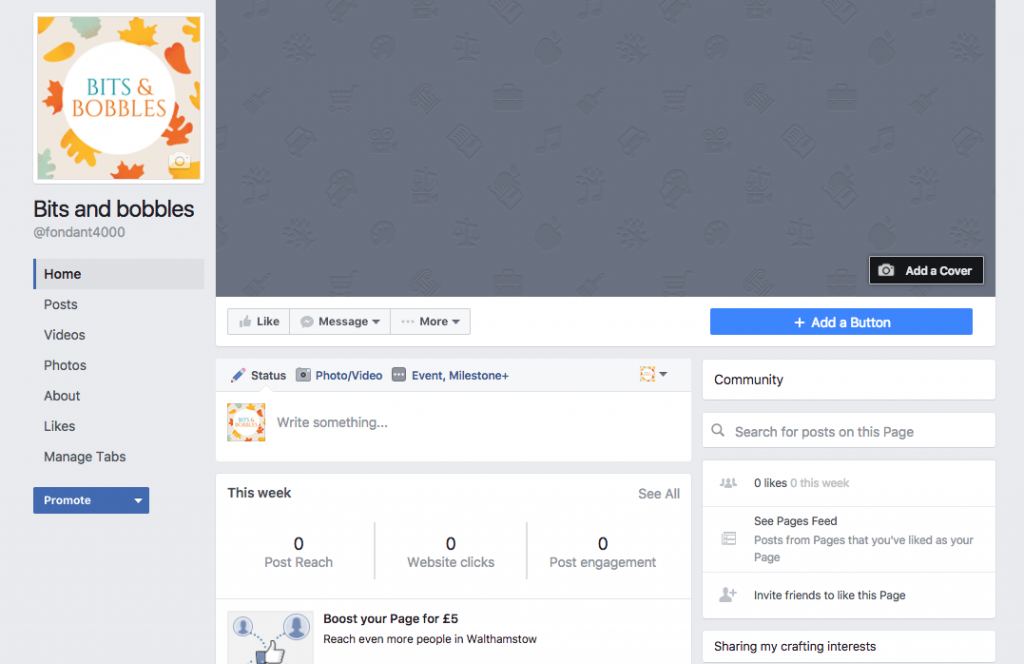
1. Add, a cover. Choose a photo (preferably of people) or make a Facebook cover in Canva (free online or as an app) – http://canva.com
2. Add a button – this is the main way people will try to get hold of you so make it an option that’s easy for you. We use ‘contact us’ with details of the UNISON helpline. Or you can send people to your branch website.
3. Add some community guidelines. You can copy and paste our UNISON community guidelines. You can add these as a post, or have a short version as a ‘pinned post’ on your page (this is more common if you are running a Facebook group rather than a page). Or you can add a ‘Notes’ section to your Facebook page
To add a notes section
- Click on ‘manage tabs’ on the left hand side
- Click on ‘edit page’
- Click on ‘Add a tab’
- Add ‘notes’ (You can also do this to add an ‘events’ tab)
- Go back to your page
- Click on ‘notes’ on the right hand side
- Click on ‘add note’
- Copy and paste the community guidelines and save
- To link to this note (or any post on Facebook) click on the date stamp at the top right of the post. Copy the url from the browser – eg Or you can just share it to your page.
4. Add other admins or helpers. You can ask others to help you run the page – they can be admins like you, or just have permissions to help with certain parts of the page.
Add a new admin
- First, the person you want to add has let you know what email address they use for Facebook.
- Click on ‘settings’ on the top right of your Facebook page
- click on ‘page roles’
- Under ‘assign a new page role’ add the email address of the person you want to invite to help you.
- They will receive a notification on Facebook that they have to accept.
- That’s it! They can now help you out. You can sort out who will cover when, or if you will be responsible for different kinds of posts.
You’re ready to start posting!